
Wicked Thumb Ebike Sidecar Installation Instructions
Over the course of this video and walkthrough we will go over everything you need to know to get your Wicked Thumb sidecar unboxed, assembled and ready to roll.
If at any point during the assembly (including right now!), you are unsure of your ability to assemble the sidecar in a safe fashion, we strongly suggest taking it to your local bike shop, where they will be able to safely complete the process, while also checking for anything that may have loosened up during transit and tuning things to your riding ability and preference.
All set? Let’s dive in!
Tools Needed for Assembly
- Scissors, flush cutters, or snippers
- 13mm wrench or socket
- 14mm wrench or socket
- 5mm Allen wrench
- Tire pump
Included in the Box
- Sidecar frame
- Sidecar body
- Seat
- Rubber carpet mat
- Seatbelt
- Sidecar fender
- Sidecar wheel
- Axle
- Utility bag
- Either two piece sidecar base plate and mounting plate assembly
- or new single piece mounting plate assembly
- U-bolts (two large, one small)
- Nyloc nuts
- Spacers
- Shims
- Mounting bolts
- Quick-release pins
- Adjustment turnbuckle
- Zip ties
I. Sidecar Mounting Plate Installation
1. Use side cutters to remove zip-ties on rear cables to provide enough slack on cables to prevent them from becoming pinched or bound up in the mounting plate installation.


2. Attach the base plate on the bike frame by placing u-bolts through the base plate. The smaller u-bolt goes on the rear of the bike frame, and the larger two go on the front.
Tip: the rear u-bolt goes at an angle between the rear cargo rack mounting bolt and the chain guard tab.
Note: Skip step 3 if you have the new single piece mounting plate design.

3. Place the mounting plate onto the base plate by putting the u-bolts through the holes shown in the diagram.
Tip: make sure the cables are free, and are not binding or pinched between the mounting plates, u-bolts, or bike frame.


4. Put the large plastic spacer block on rear u-bolt, then add the metal shim, the small washers, and thread nyloc nuts onto the u-bolt just until finger tight. Do not fully tighten the nuts at this time.


5. On the top front u-bolt, place a shim, washers, and nyloc nuts.

6. On the bottom front u-bolt add the small round spacer, a shim, washers, and nyloc nuts.


7. Tighten all nyloc nuts down onto the u-bolts.
Tip: be careful not to over tighten the nuts, as it could damage the frame of the bike.
8. Replace zip-ties on rear cables with new ones.


II. Sidecar frame and body assembly
1. Attach the sidecar frame to the mounting plates on the bike using either the provided Allen bolts or quick-release pins.
Tip: Do not install the bottom bolt/pin that connects the adjustment turnbuckle to the frame yet to more easily move the frame around when installing the wheel.

2. Assemble the wheel by removing the nut on the side of the axle that will be facing inward. Remove the conical spring on this side, slide the axle through the wheel, replace the spring, and loosely thread on the nut.
Note: the side of the wheel with the 6-bolt mount for a disc brake goes on the inside/the side with the nut.


3. Install the wheel on the sidecar frame by placing the receivers on the sidecar frame on the axle, tightening the axle bolt, and locking the tension clamp.
Reminder: the side of the wheel with the 6-bolt mount for a disc brake goes on the inside, and the tension bolt should be on the outside.
Tip: if the bottom Allen bolt/quick-release pin was left uninstalled to make wheel installation easier, install it now.

4. Mount the fender using the Allen bolt and nyloc nut.
Note: The tangs on the fender go toward the front.

5. Place the car body on frame.
Tip: the sidecar body is heavy. Get assistance lifting the sidecar if needed.
6. Determine mounting position of seatbelt.
Note: make sure the seatbelt mounts face outwards toward the sides of the sidecar body when tightening the bolts later.
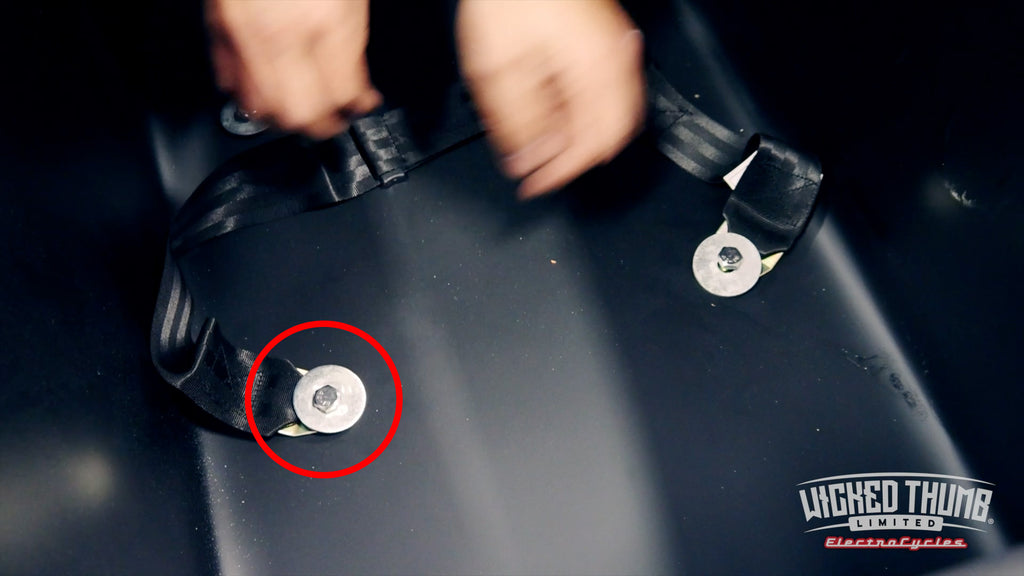
7. Place mounting bolts through holes in the sidecar body, lining them up with the holes in the sidecar frame. Place large washers on topside of the mounting hole. Place rubber grommets on the bolts between the sidecar body and frame. Finally, place small washers and nuts on the bolts on the underside of the frame.

8. Tighten nuts and bolts using a 14mm wrench for the top of the bolt, and a 13mm wrench for the nut on the bottom.
Tip: this requires some coordination when doing it yourself. Get assistance if necessary.
Tip: do not over tighten the bolts, as it may damage the body of the sidecar.
9. Use the adjustment turnbuckle to adjust the pitch of the bike so that the bike is leaned in slightly toward the sidecar.

10. Place the rubber carpet mat in the sidecar.
11. Place the seat in the sidecar.
12. Inflate the sidecar tire to 20psi.
13. Inspect all fasteners to ensure they are secure prior to riding. After the first few rides, inspect all fasteners again to ensure nothing has come loose.
Warning: the sidecar has a maximum load of 120lbs and a maximum operating speed of 10mph. Exceeding these limits could damage the sidecar and/or cause a loss of control which could result in injury to yourself or others.
Note: when operating the sidecar without a passenger, it is advisable to place a load of 30-50lbs in the sidecar in order to improve handling.